After adjusting userConfig.js, app.json, notifications and ads, the app is now ready to be built. This article will show the steps to build the app. However, you can always refer to Expo detailed documentation.
Publishing to Expo
To publish the app to Expo, this can be through this command in the terminal:
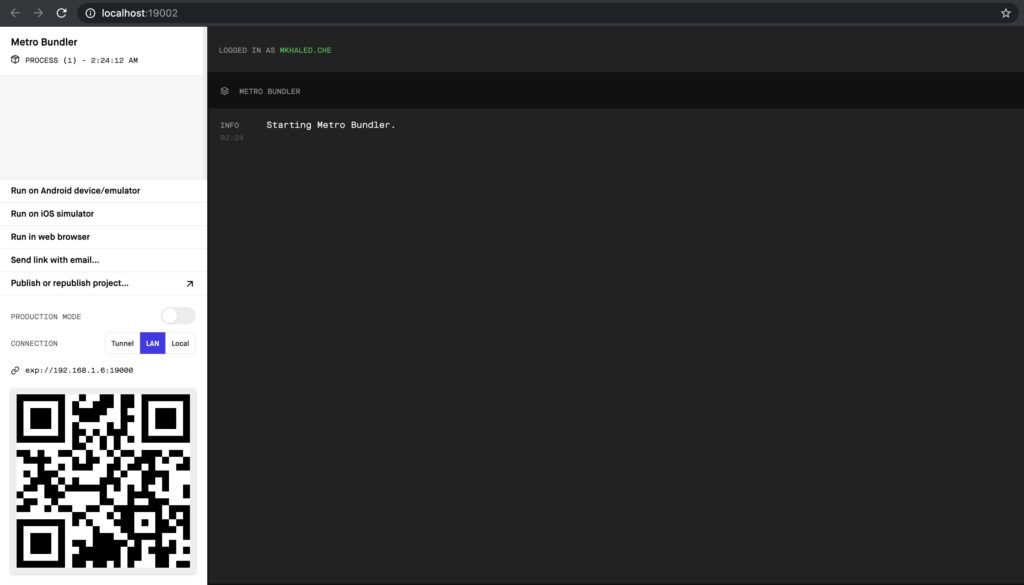
expo publishPublishing also can be through browser interface in the middle left:

Publishing on Expo will need an Expo account. It’s easy and free to create an Expo account. So you will be requested to enter your username and password. After the app is published, it will be available on Expo servers. expo-publish can also be used to update the app without uploading the app to the stores.
Windows users must have WSL enabled. You can follow the installation guide here. We recommend picking Ubuntu from the Windows Store. Be sure to launch Ubuntu at least once. After that, use an Admin powershell to run: Enable-WindowsOptionalFeature -Online -FeatureName Microsoft-Windows-Subsystem-Linux.
Building the app on Android
There are two ways to build an android app, one can be by building an apk, which shall be through this command:
expo build:android -t apkThis can also be by building an app bundle, this is much better option as Google Play Store can optimize the size of the app to be 25 MB instead of 50 MB, this can be done through this command:
expo build:android -t app-bundleExpo can generate a Keystore file. You will need to install Java at this step to enable the building process if you haven’t installed it before.
Afterward, you will see a link that tracks the building process. The building process shall take some time, then the file shall be available at the link provided by Expo or you can just go to your Expo account and you can access all your recent builds (within a month).
You can then publish your android app to Play Store.
To publish an app to Play Store, you should have an Android developer account. This costs $25 one time fee.
Building the app on ios
In order to build an ios app, you should first have an Apple Developer Account. It costs $99 per year and it may take 2 days to accept the account and activate it but it’s a must because any app build will need an account authentication.
If this is the first app you submit to Appstore, make sure it follows Apple Developer Guidelines before you create a developer account. Apple has more strict conditions to approve apps. So you should be aware of the guidelines in order not to pay $99 and then get the app rejected.
You will enter the below command in the terminal:
expo build:iosIt will ask for your Apple developer account credentials. Afterward, it will ask for some certificates, Expo also can handle that and generate the required certificates. For the first time, you may find an error message:

You may to run the build again, the credentials will be ready this time and it should work.
When all required keys and certificates are generated, the build process shall start. It may take a while, the same as in the case with android. After building, you can download your ipa file from your Expo account
Distribute the ios app to Appstore
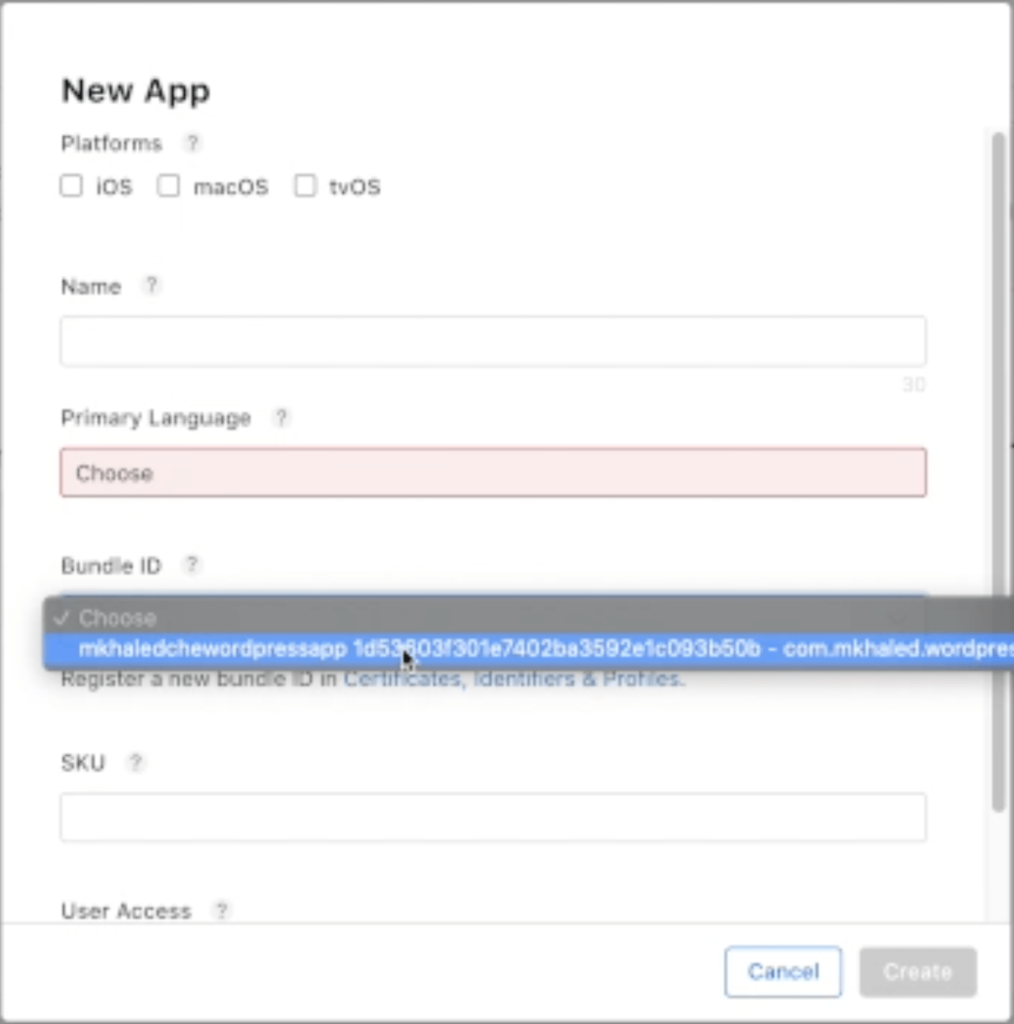
Distributing the app to Appstore is more complicated than in the case of the Play Store. You can start adding an app by clicking the “+” icon beside the heading Apps. You will see this form:

You can write the name of your app and its language. You will see bundle ID with an option for the build you just made, then you can add the SKU, this can be package name as written in the app.json form.
You will be redirected to your app’s page, you can add the inputs related to your app, there are just 2 concerns especially if you don’t have a MacBook:
Uploading your ipa file
To upload your app to the App Store, you will need to upload it through the upload tools, these tools can be either the Transporter or the Xcode which are only available on Mac.
If you don’t have a Macbook, this can be solved by one of the below methods:
- Borrow a Macbook from a friend. Make sure to use the Apple ID related to your Apple developer account in this case.
- Use a virtual machine on your computer. You may check how this is done on Youtube. There are many videos explaining it, but it shall need high PC requirements.
- Use a Mac cloud hosting service, this is a paid service. If uploading to App Store shall be the only purpose (which doesn’t take much time), using Mac in Cloud Pay as you Go plan will be enough. It costs $30 for 30 hours that can be used at any time, this will be better than monthly plans. You can use also any other hosting service if you like. When your account is ready, you can sign in with your Apple ID, install the Transporter tool from App Store, and upload your ipa file. It will take around one hour to appear on your app page in Apple Developer Account. The video below shows an example of this process:
Adding Screenshots
Apple will request two types of screenshots for you app:
- Screenshots for your app in a mobile before iPhone X
- Screenshots for your app in a mobile after iPhone X
So make sure you have access to these two types of iPhone, you can always access the app from Expo Client app, log in to your Expo account, and open the published apps, you will be able to see it there.
Share this:
[…] creation of a PFD is typically based on the output of process simulation software. We have discussed plant simulation’s role in a project in the previous article. In a nutshell, process simulation involves using specialized software to model and analyze the […]


