Introduction
Live search is now a common functionality used in mobile and web applications. It has a much better user experience. That’s why it is getting more important to apply in different applications nowadays.
This article shall show how to apply this functionality in a React Native app. It shall use WordPress REST API as a backend to render the related posts or pages or whatever custom post types in the app.
This article is assuming basic knowledge of React Native and how to set up the environment with Expo. You can check out How to Setup your Expo Environment and how to Start your first app with Expo for more information.
Creating React Native app
So let’s start creating our app through Expo. I’ll write the command:
expo init live-search
After choosing the blank template, the app starts to build and create the live-search folder. After going to live search folder, writing expo start and opening the app on your device or simulator, you would see a blank screen with this message:
“Open up App.js to start working on your app!“
Adding Search bar to the app
In order to add a search bar, we can use a package like react-native-paper. It’s a simple package and has a nice looking search bar. So you can just write:
yarn add react-native-paper
You can use npm for sure as well, depending on your preferences 🙂. Finally, this package would be installed.
Now let’s move to React Native Paper documentation and copy the code related to the Searchbar. I’ll import it and add the import code to the top:
import { Searchbar } from 'react-native-paper';
Then I’ll return the Searchbar component instead of the Text component, the App component will look like this:
export default function App() {
	return (
		<View style={styles.container}>
			<Searchbar placeholder="Search" onChangeText={() => {}} value="" />
			<StatusBar style="auto" />
		</View>
	);
}
So now the search bar should appear. Let’s move on to next step.
Set the State for the Search Input
In order to activate writing on the search input, we would need to preserve its state, so we can use the useState React hook, we can import it from React:
import React, {useState} from "react";
Then we can use it to create input value and setInput state function. Let’s write this code after declaring the App component and before the return function:
const [input, setInput] = useState("");
Then let’s change the value prop within the Searchbar to be input.
Then we change the onChangeText prop. This prop receives a function with input text as an argument. So we would need to include setInput here to set the search input to the text written. It could be written this way:
			<Searchbar
				placeholder="Search"
				onChangeText={(text) => {
					setInput(text);
				}}
				value={input}
			/>
So now searching the text should work:
Now let’s start fetching the app from the backend.
How to add Search Parameter in WordPress REST API
WordPress comes with a built-in REST API, so just through going to the related endpoint, it will fetch the posts in JSON format, this is an example for the link to the API to get the last 10 posts:
website.com/?rest_route=/wp/v2/posts
Or if the pretty permalinks are enabled, it could be this way:
website.com/wp-json/wp/v2/posts
To search the posts having a specific word, we will add the search query parameter with the text to be searched for, so the link to API shall be this way:
website.com/wp-json/wp/v2/posts?search=whatever+text
If you wish to search for more than one post type, this could be through the search route:
website.com/wp-json/wp/v2/search?search=whatever+text
This shall show all related post types, however, it won’t show their content or excerpt, so if you need to show the post content or excerpt, you would need some modifications in the built-in REST API like the solutions here or add a custom route for the search as in RNWP App Template Config plugin. Through this plugin, you can choose to add the post types you like in the search query and show their content and excerpt if you don’t prefer to write code in the WordPress backend.
Fetching the data from the app
In order to fetch the website data from the app, we can use the javascript ES6 fetch function. This is an asynchronous function that would return a Promise that would resolve or reject depending on the response from the backend (WordPress REST API in our case).
So let’s create a new async function, call it fetchData and add the function inside:
async function fetchData(text) {
		const res = await fetch(
			`https://demo.wp-api.org/wp-json/wp/v2/posts?_embed&search=${text}`,
		);
		res
			.json()
			.then((res) => {
				console.log(res);
			})
			.catch((err) => console.log(err));
	}
Notice that the fetchData function has a text parameter.
We shall call the fetchData function in the onChangeText prop in Searchbar component:
	onChangeText={(text) => {
		...
		fetchData(text);
	}}
Now, as long as you add text input in the search bar, you can start to see an array of related post objects in the log. These are the search results.
So before we shall show them in our app, we need to preserve these results in a state, so I’ll create a state called results and a function of setResults with an empty array as the initial state:
const [results, setResults] = useState([])
Then set the results to the search results when the fetching resolves. So I’ll add this code in the fetchData function:
...
res.json().then((res) => {
        setResults(res);
        console.log(res);
      })
...
So we can now use the results variable to express the search results. Let’s start showing them in our app.
Using FlatList Component to show Search Results
In order to show the related posts title and excerpt, most probably they shall need a height greater than the height of the device. Accordingly, it would be better to render either ScrollView or FlatList. In our case and to enhance the performance of the app, I shall use FlatList. So first, I will import it from React Native:
import { StyleSheet, Text, View, FlatList } from "react-native";
Then I’ll return it in our app under the Searchbar component:
	<FlatList
		data={results}
		renderItem={({ item }) => (
		<View>
			<Text>{item.title.rendered}</Text>
			<Text>{item.excerpt.rendered}</Text>
		</View>
		)}
		keyExtractor={(item) => "" + item.id}
	/>
The FlatList component has 3 main props:
dataprop which accepts an array for the data to be rendered, in our case, it will be the results variable.renderItemprop which accepts a function to return what components to be shown from the search results. In our case, it will be the title and excerpt shown in twoTextcomponents.keyExtractorwhich considers a unique id for each item.
Just a minor styling fix to consider is that the SearchBar is no more in the center after adding the FlatList, but it is now in the top, so I’ll just add a marginTop of 20 to the component in order to avoid clashing with mobile top notch. For sure when designing your app, it would be a better practice to use SafeAreaView. It’ll look like this:
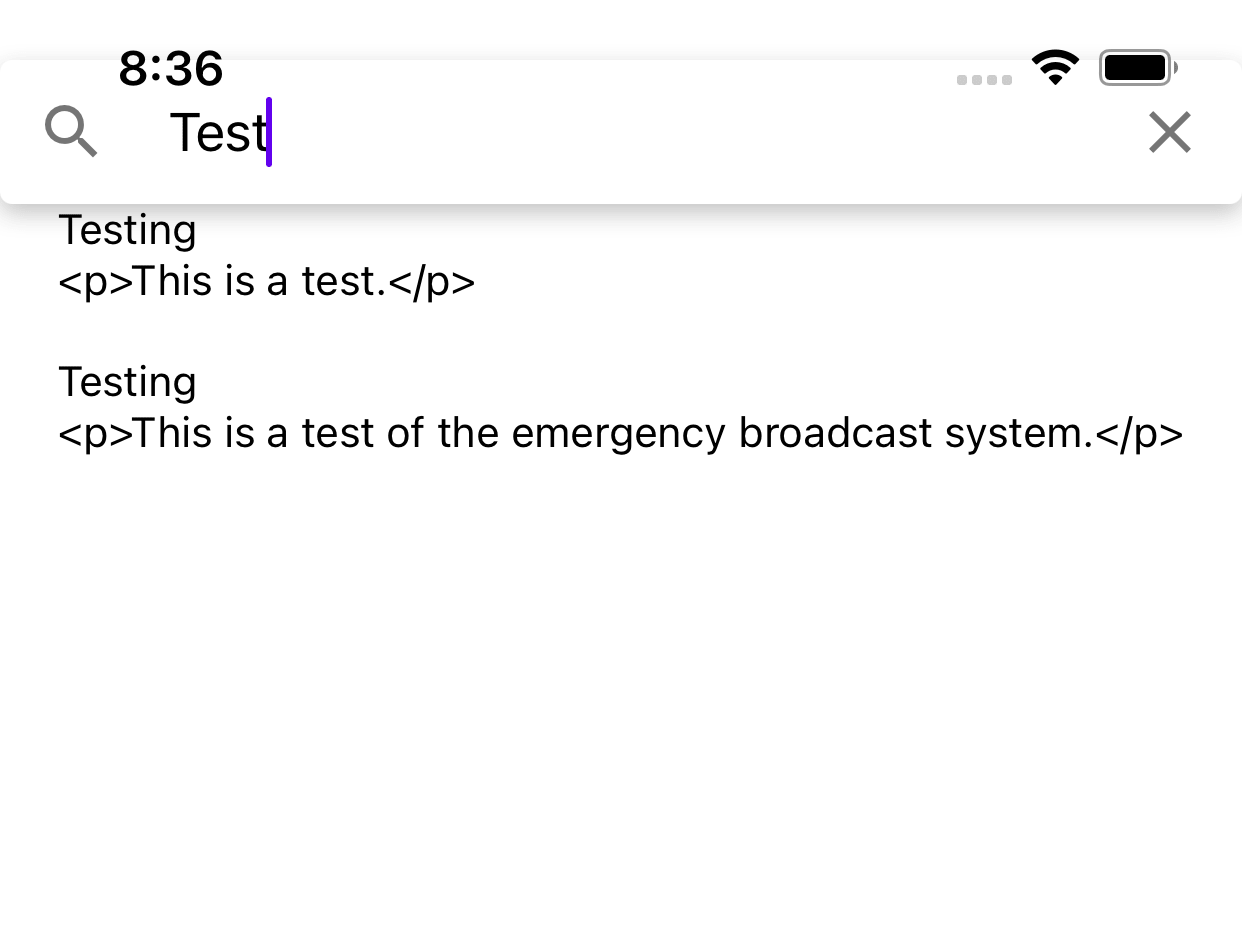
So now the results appear while searching for text within the website REST API. Of course it will need styling and adjustments in order to look professional.
Minimize Search Queries using setTimeout
After fetching the search results from a WordPress website, we will need an important performance optimization to reduce the number of queries to the database, as the user types test, there is no need to search for “t”, then “te”, then “tes” and so on.
So as the user types, I’ll prefer to trigger the fetch function after 2 seconds. If the user taps on the keyboard within these 2 seconds, I will reset the timing, so that the server request and database query would only be triggered when the user stops tapping on the search for 2 seconds.
I will start adding a state for search timer:
const [searchTimer, setSearchTimer] = useState(null);
Then I shall modify the Searchbar onChangeText callback function to add the timer:
onChangeText={(text) => {
	if (searchTimer) {
			clearTimeout(searchTimer);
			}
	setInput(text);
	setSearchTimer(setTimeout(() => {
			fetchData(text);
		}, 2000),
		);
		}}
As we can see here, I used setTimeout javascript function. It takes a callback function (where we shall call the fetchData function inside) and time for its execution (which is 2000 milliseconds) and it shall return a timer id that shall be stored in searchTimer value.
So if the user taps on the keyboard while this timer id exists, we will need to restart timing again. This can be done using clearTimeout function. Otherwise, if the 2 seconds pass, the fetchData function shall trigger.
So now this request to the server will only be performed if the user stops typing for 2 seconds, which will save resources.
Conclusion
So this will be how our App.js file will look like:
import { StatusBar } from "expo-status-bar";
import React, { useState } from "react";
import { StyleSheet, Text, View, FlatList } from "react-native";
import { Searchbar } from "react-native-paper";

export default function App() {
    const [input, setInput] = useState("");
    const [results, setResults] = useState([]);
    const [searchTimer, setSearchTimer] = useState(null);

    async function fetchData(text) {
        const res = await fetch(
            `https://demo.wp-api.org/wp-json/wp/v2/posts?_embed&search=${text}`,
        );
        res
            .json()
            .then((res) => {
                setResults(res);
            })
            .catch((err) => console.log(err));
    }
    return (
        <View style={styles.container}>
            <Searchbar
                placeholder="Search"
                onChangeText={(text) => {
                    if (searchTimer) {
                        clearTimeout(searchTimer);
                    }
                    setInput(text);
                    setSearchTimer(
                        setTimeout(() => {
                            fetchData(text);
                        }, 2000),
                    );
                }}
                value={input}
            />
            <FlatList
                data={results}
                renderItem={({ item }) => (
                    <View>
                        <Text>{item.title.rendered}</Text>
                        <Text>{item.excerpt.rendered}</Text>
                    </View>
                )}
                keyExtractor={(item) => "" + item.id}
            />
            <StatusBar style="auto" />
        </View>
    );
}

const styles = StyleSheet.create({
    container: {
        marginTop: 20,
        flex: 1,
        backgroundColor: "#fff",
        alignItems: "center",
        justifyContent: "center",
    },
});
So this article showed how to create a search bar using React Native Paper package, how to keep its input as a React state, how to send a request to WordPress REST API through fetch function, how to show the results in a FlatList component, and finally how to optimize the performance by sending only the necessary requests using setTimeout function.
Share this:
[…] creation of a PFD is typically based on the output of process simulation software. We have discussed plant simulation’s role in a project in the previous article. In a nutshell, process simulation involves using specialized software to model and analyze the […]