After learning how to configure the app for the website, let’s start configuring the app.json file. This file sets up some configuration variables before being built in order to be submitted to the stores.
This configuration is related to the RNWP app template for WordPress. This article is mainly focusing on some basics and what the user who has this template needs to configure. For further configuration or if you need more information on app.json folder, you can refer to Expo documentation.
Please note that the configuration of this file shall need some direct modifications in the code. So if you have no coding skills just follow exactly what is written in this article. Modifications are minimum and shall be either replacing some names or versions by names and versions related to your app or by direct copy and paste. It’s highly important as well to open this file from VSCode or from any other code editor in order to be easily readable.
So let’s start talking about what shall be needed:
Expo Variables
You will find the first variables under "expo" key related to name, slug and version. These variables are just for Expo platform so that anyone can access the app from Expo platform when the app is published on Expo. As not many people will mind opening Expo to check an app, it is not highly important to modify these values but it may help for testing purposes.
You can just change the value My App Name to the name of your app, and my-app to a slug related to your app. Slug will be used as a link on Expo so you should separate words by dashes, not spaces. You can also change the version if you like but it is necessary as well.
Please ensure that all values you changed are within double quotes as their absence would return an error and the app won’t start. VSCode will show a warning if an syntax error was found in the file.
Icon and Splash Screen
The icon shall be the app icon that will be shown to the user. The splash screen is the screen that shows when the app starts loading.
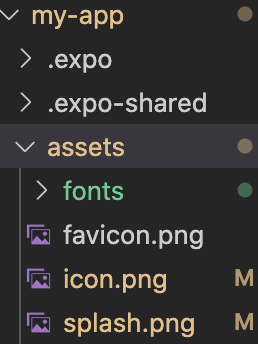
To change the icon and splash screen to the ones related to your app, there is no need to change anything in the app.json file. You should just make sure that your photos are in png format and that they are named as icon.png and splash.png. Then you can go to the assets folder and paste your splash screen to replace the one in the folder.
Icon size should be 1024 X 1024 px. Splash screen size shall be 1242 X 2436 px. If you don’t know how to create an icon you can use a tool like canva to create them. It’s super easy.
IOS Variables
Bundle Identifier
If you go down in the file, you will find a key called "ios", it has some variables inside the curly braces. Our concern here is related two variables; bundleIdentifier and buildNumber.
A bundle identifier should be a unique identifier related to your app. A common practice is that it is written as follows:
com.yourdomainname.yourappname
You can choose the name you like for yourdomainname and yourappname but make sure the bundleIdentifier would be a unique name. Also, you shouldn’t separate between words with any special characters, e.g. com.mydomainname.mywebsite NOT my website or my-website or my_website.
Build Number
For the first time, you won’t need to change the version number. But if you updated the app to be resubmitted you the app store, you should increase the build number. Otherwise, you won’t be able to upload your app to the Appstore.
Usually, the number on the left is for highly major changes and the number of the right for minor changes (e.g. small bug fixes) and the one in the middle for intermediate changes. So if the app buildNumber was 1.0.0, if it was raised to 2.0.0, this would reflect a major change, but if it was raised to 1.0.1, this would reflect a minor change.
Android Variables
Package
Same as bundleIdentifier in ios, you will need to define the package in android, same methodology in writing the package name will be followed except that underscores can be used e.g. com.mydomainname.my_website
Version Code
versionCode should be updated each time before the app is submitted to Play Store, so it will not be changed in the first submit to Play Store but it shall be incrementally increased by 1 every new submit. e.g. 1 then 2 then 3, …etc.
Firebase Push notifications configuration
The app supports the scheduled notifications by userConfig.js file without the need to update app.json file. For push notifications to work on android, they should be integrated with Firebase. You will be requested to download the google-services.json, then add this file to the root file of your app. You will need to add a googleServicesFile key under the android key in the app.json file as follows:
    "android": {
      "useNextNotificationsApi": true,
      "package": "com.rn_wp.android",
      "permissions": ["READ_EXTERNAL_STORAGE", "WRITE_EXTERNAL_STORAGE", "NOTIFICATIONS"],
      "googleServicesFile": "./google-services.json"
    },
Make sure you have downloaded the google-services.json file and added it to your root app folder before updating app.json file. Otherwise the app will give an error and won’t start.
Admob Integration
To activate ads on the app, you need an Admob account in order to add the admob key as follows:
    "android": {
      "useNextNotificationsApi": true,
      "package": "com.rn_wp.android",
      "permissions": ["READ_EXTERNAL_STORAGE", "WRITE_EXTERNAL_STORAGE", "NOTIFICATIONS"],
      "config": {
        "googleMobileAdsAppId": "copy your admob key here"
      }
    },
How will your android key look like?
If you made notification configurations as well as ads, then your android key will be as follows:
    "android": {
      "useNextNotificationsApi": true,
      "package": "com.rn_wp.android",
      "permissions": ["READ_EXTERNAL_STORAGE", "WRITE_EXTERNAL_STORAGE", "NOTIFICATIONS"],
      "googleServicesFile": "./google-services.json",
      "config": {
        "googleMobileAdsAppId": "copy your admob key here"
      }
    },
In case there are neither ads nor notifications, then android key will be as follows:
"android": {
      "useNextNotificationsApi": true,
      "package": "com.rn_wp.android",
      "permissions": ["READ_EXTERNAL_STORAGE", "WRITE_EXTERNAL_STORAGE", "NOTIFICATIONS"]
    },
Share this:
[…] creation of a PFD is typically based on the output of process simulation software. We have discussed plant simulation’s role in a project in the previous article. In a nutshell, process simulation involves using specialized software to model and analyze the […]